This is a really tough question to try and address for obvious reasons. So take this as one player’s advice, not cleat gospel. Don’t get mad at me if you break an ankle following this guide. But here's a bit of a breakdown of what I look for when purchasing a new pair and some miscellaneous tidbits I've picked up in my last 12 years of playing.
Also, it is important to note that although I have no experience with women’s cleats, this guide should still apply for the most part. Just be sure if you are buying online to look in the women’s section. They are designed for the female foot, ie. narrower, arches moved slightly, and typically lighter than men’s cleats.
Preface - Types of cleats.
There are two main types of cleats for Ultimate players; Football and Soccer. In the past few years Lacrosse cleats are becoming more and more popular, although most say that Football and Lacrosse cleats are fairly interchangeable.
In addition to these main types, there are different kinds of pegs/studs/treads (they go by a bunch of different names) that are available as well for each kind of cleat. You will typically only find these two in a store;
bladed and
round, some models have hybrids of both. Round pegs have a tendency to allow for quicker motion in all directions and are generally accepted as having better performance in wet/soft ground conditions. Bladed cleats however, are typically better performers on dry grass and some people say they leave players less prone to injury (although studies are on the fence, some come to the conclusion that round pegs activate the quadriceps more and thus lead to greater chances of ACL injuries,
others say that the risk or injury is nearly identical).
Some things I will not be talking about:
Baseball cleats. I simply find that they have too much grip on turf and grass for the type of motions Ultimate players use. If you’re looking for a surefire way to tweak an ankle go ahead and try them. Or if you use ankle braces they might not be a bad option. But I’ve only tried them twice, both with terrible results (photos available upon request).
Removable/replaceable pegs. Some cleats come with removable/replaceable peg options. They’re great for really customizing the tread pattern for the wearer. But the pegs and “housing” do not last nearly as long as molded cleats, and are much for susceptible to breaking off mid-play.
First - Determine what type of player you are.
Cutters move differently than handlers. Quick players move differently than slow players. Deep threats cut differently than mid/under cutters. Men move different than women.
The basic idea is to think about the way you move (and want to move) on the field. The more aggressive you want your cuts to be, the more grip you are going to need. More grip, means greater risk of tweaking an ankle on a cut, and usually less comfort. But also means you can change your direction on the fly.
Many Football players have movements that are close to Ultimate players, especially in the wide receiver, safety, and cornerback areas; lots of lateral cutting and changing of direction. So I usually recommend going with a pair of Football cleats as opposed to soccer.
If you need vertical (for all you deep players), find a pair of cleats that are lightweight and have some ankle support. Avoid cleats like the
Nike Air Zoom Super Bad at 14.6oz and maybe lean towards something like the Adidas F50 adiZero TRX FG or the Under Armour Nitro III mid’s.
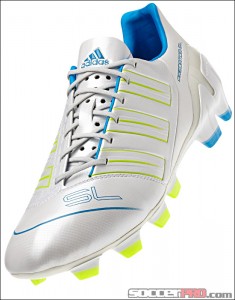
Pure mid-cutter looking for all around speed, weight and comfort? Try the Adidas Scorch X Superfly series. These bad boys are lightweight, and have a ton of grip in all conditions. Just be careful on turf with the low ankle support version, because there is so much grip you can roll ankles if you’re not careful.
All handler all the time? Find a pair of the most comfortable and stable cleats you can, something like the Nike Zoom Vapor Carbon Fly TD’s. No one needs a handler who slips every time they fake or throw a big huck.
Second – Figure out your foot size.
The general rule is to aim for your regular shoe size, but keep in mind you want them to be snug. Your toe should be as close to the end of the shoe without touching, a ¼ - ½ inch gap is fine. If you’ve tried on a lot of cleats you’ll know that different brands have different feels and sizes. Nikes tend to fit a little smaller (narrower) than other brands, but it is always best to try a brand out at the store first before buying, this is not to say you should buy your cleats in store. On the contrary, I always recommend purchasing online, but we’ll get you that a bit later. Remember that cleats should be a bit tight at first and they can take upwards of 2 months to really break in and feel right.
It’s not only shoe size that needs to be considered, but the width of your feet compared to the average person as well. Most players who have the “wide foot” issue will already know the horrors of having to buy shoes and cleats that are 2 or 3 sizes too big just so that they are wide enough for you.
Players with wide feet should typically avoid all soccer cleats. Football is the big man’s domain, so stick with a linebacker type of cleat. Basically anything by Reebok is fine and lots of stuff by Under Armour as well. If you’ve got ridiculously wide feet where no matter how many sizes up you go they still squeeze, aim for something like the Under Armour Hammer III’s. Definitely not the fastest out there, but guaranteed to be the most comfortable for you.
One other thing to note, if you play with ankle braces like the Active Ankle or Aircast, you are going to want to go a ½ size up for sure just to make sure you have enough room for a comfortable fit.
Third – Type of surface.
If you’re wanting to take your cleat experience to the next level, you should have a pair for wet and long grass fields, dry and short (or no grass in some cases) fields, and some will say specific turf cleats (like the Nike Air Destroyer 5/8) as well. I’ve personally never used turf cleats so I can’t really say whether they’re truly worth it or not, but one thing is for sure, they are almost useless in wet conditions. They have been known to produce positive results on very dry fields, but if you’re on a budget there’s no need to bother with them.
Blade cleats are definitely recommended for dry conditions. The spacing between blades helps increase stability. And the wider surface area means the blades won’t puncture the surface in order to grip which is exactly what you want.
As you can guess, round pegged cleats are much better in wet conditions. Some are able to dig up to ¾ inch into the surface to ensure minimal slipping. Be mindful of the spacing between pegs, the closer they are the greater the tendency to get mud and grass stuck in them reducing their effectiveness.
Fourth – Comfort.
Do not expect cleats to be incredibly comfortable the first time you wear them. It shouldn’t hurt to play, but they will not be completely broken in to your feet for at least a few games. Sometimes it can take months for them to feel just right. So try to avoid buying a brand new pair right before a big game or tournament. Other than that, it’s all about personal preference and making sure you have the right size.
After once game your feet should still feel good. After a tournament they will be sore no matter what you do. Double socks, insoles, and tape can all help with minor comfort issues for lots of play in a weekend.
Fifth –Insoles.
Sometimes you need them, sometimes you don’t. If you find that your cleats just aren’t supportive enough or don’t have enough cushion, or if you bought a pair of cleats that fit great length and width wise but just aren’t snug enough, don’t go to a larger size right away. Insoles might be the answer. My personal favourites are in almost every pair I own; the
Sole Softec series. These will run you $30-$50 depending on the style you go with, but they are absolutely amazing! You get a set that has the thickness you are needing (for cleats I only use the
Thin Sport, but the Medium Sport ones could work depending
on how much room you need), toss them in the oven for a few minutes, put them in your shoe and stand in them for 5 minutes. The form fit to your feet giving you custom insoles.
One of the nice things about insoles is that you can move them to different pairs of cleats, so you really on have to buy them once. And after you bruise a heel stopping quickly, you will never play without them again.
OTHER NOTES:
Durability
A good pair of cleats should last the average player 3-6 seasons. Remember if you are playing in winter as well as summer it is two separate seasons. Touring and high level players can expect to go through one pair every year.
If you are looking for a pair that will last you a decade (figure of speech), your best bet is probably the
Adidas Copa Mundials. One of the most popular cleats ever made, players say that they simply last forever.
Shop Online
Once you are confident with the type and size of cleats you are wanting don’t be afraid to order them online for a much wider selection of styles, colours, sizes, and better pricing. For the last 5 or 6 years all of my cleats have come from www.Eastbay.com. But you can order right from most manufacturers websites if you prefer.
www.final-score.com is the Eastbay outlet site. Anything you see here is going to be hit-or-miss in terms of selection and sizing, but pricing and quality is amazing!
www.worldsoccershop.com is pretty good too if you are wanting soccer cleats
Buy online tip: Get together with friends and place your orders at the same time and ship to the same place. You can quite often get free shipping (even to Canada), and sometimes you will all get a discount as well.
Pricing
A good general rule is to stick with brands you know (Nike, Adidas, Under Armour, Reebok, New Balance, etc.), and
do not buy cheap! If you are on a budget, take a look online or at outlet stores, but do not go to Wal-Mart or Zellers and expect to get a good quality pair of cleats for $20. I usually expect to spend somewhere in the
$60-$150 range depending on style and popularity at the time.
Remember this is just advice and opinion. You need to figure out the fine tuning on your own!
Questions? Comments? Hit me up!
Stay frosty!
Jarrod
TL:DR -
Buy brand names.
Stick with football, lacrosse and soccer cleats.
Determine your playing style, and pick out cleats with a stud pattern that suits you best.
Look into insoles if the fit is close but not quite there, or if you need extra support.
Expect to spend $60-$150.
Buy online.
Talk to me if you need more info!